
DIY! Do it yourself. Sports jersey inspired tshirt using ribbons tospice up an old tshirt! No sew! explained for beginners!
9:22 am
Hi everyone!
Today
I will be doing a DIY on how I added some gold and silver ribbons to decorate
and spice up your shirt. I was inspired by a sports jersey. The design looks like this and let me show you how I
did it.

The
items you will need are a pair of scissors, fabric glue, and ribbons of your
choice. As for me, I picked silver and gold glitter. Other optional items
include fray glue or clear nail polish.

There
are a few things to note when doing this DIY.
I
recommend getting a tshirt that does not stretch out while it is being worn.
This really depends on the material of the tshirt.

This is because ribbons are
not elastic. Unless you get the elastic type of ribbons, the ribbons may
constrict the sleeves part of the tshirt.

To prevent this, get a shirt that is
not stretchy or doesn’t stretch out while it is being worn.
To
add on, the type of ribbons you get may not be exactly the same. This depends
on the width, color and material which may helps to add some texture and
pattern. If you choose ribbons with a thinner width, you can add a few more
layers of ribbons. But, if you get a wider ribbon in terms of length you may
not add as much. So its really personal preferences, as for me, I only have 2
layers, one silver and one gold ribbon.
To
start, get an old shirt or top that you
are alright with using. As for me, I chose my black shirt.

Using the sleeve, measure the tshirt to see where you want
to place the ribbon.

As for me, I chose the gold ribbon to be 1cm above the seam.

Next, I marked out where the ribbon should be. You do not really need a ruler to be that accurate and precise, as long as both sleeves are identical, it should be fine. Next, taking the ribbon, I measured the circumference of the sleeve.
As for me, I chose the gold ribbon to be 1cm above the seam.
Next, I marked out where the ribbon should be. You do not really need a ruler to be that accurate and precise, as long as both sleeves are identical, it should be fine. Next, taking the ribbon, I measured the circumference of the sleeve.
I measured the sleeve using the ribbon.

I measured the top
part of the sleeve and fold the ribbon to double it in terms of length.
Then take the ribbon and cut it to the desired length. When
cutting the ribbon, cut it in a v shape instead of straight across to prevent
the ribbon from fraying.


I do recommend to cut it slightly longer than need so you can trim off the excess. Remember if it is too longer, you can cut it shorter but it if it to short, you cannot make it longer. Yes, you can use a few ribbons to form one round around the sleeve of your shirt but I think it would be neater to use one long piece instead of a few little pieces.
I do recommend to cut it slightly longer than need so you can trim off the excess. Remember if it is too longer, you can cut it shorter but it if it to short, you cannot make it longer. Yes, you can use a few ribbons to form one round around the sleeve of your shirt but I think it would be neater to use one long piece instead of a few little pieces.
Repeat the same steps for the silver ribbon, measure and cut.

After cutting for an optional step, if you are worried the
ribbons may fray, take some fray glue or nail polish to apply at the ends of
the ribbon. For a precautionery measure, I placed my ribbons against the shirt
to check or any problems and to see if you are satisfied with the length and
how it looks.

I glued the ribbons because I was sewing challenged but if
you are able to sew it on, that will be even better. Please note where is the
best place to end it. I recommend putting it on the inside or the inner part of
the sleeve or if not the side edges where
it may be a little less obvious as compared to the top part of your sleeves.

When glueing the ribbon onto the sleeve, make sure to press it down so that it sitcks properly.

When glueing the ribbon onto the sleeve, make sure to press it down so that it sitcks properly.
Once I am done with the first sleeve, I move onto the next
sleeve using the original sleeve as a guide or reference for measurements. It
is the same steps as before, measure, cut and paste.

Once you finish pasting, you are done with the sleeves!

Once you finish pasting, you are done with the sleeves!
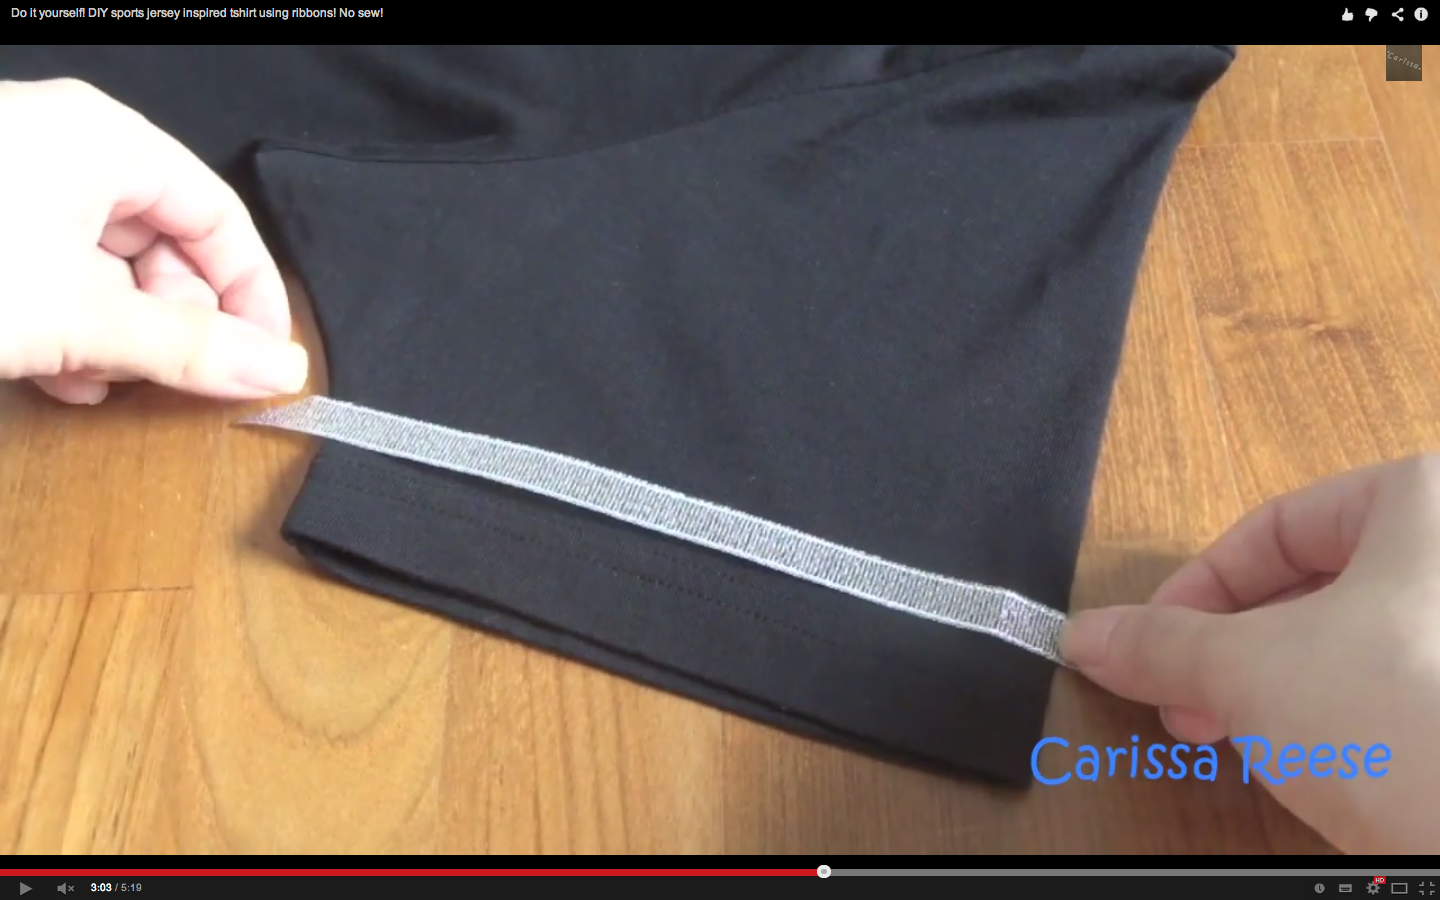
Moving onto the ends of the shirt, it is also the same
steps. The only difference is that the ribbons are longer so you have to be a
little but more careful when pasting it on. Since the ribbon was long, I did
one side at a time. I glued the first bit of the ribbon and paste it on the
front of the shirt compared to gluing the whole ribbon.
Measure,

glue,

Paste.

Moving onto the silver ribbon,


That’s it for this post. I hope my explanation was at least somewhat clear enough and hopefully the pictures help to understand better.

I really like the outcome of the shirt. I like the color contrast of the ribbons against the black tshirt and how it kind of looks like a sports jersey. I hope you guys will like it too!
xo
carissa


0 comments